It took me a bit of research to figure them out, and I'm really an amateur. I went to a blog with progress bars I liked, highlighted them, and right clicked - then clicked on view selection source. Then I just copied the text to my blog. In blogger, it goes under the configure html /javascript links.
OK, have a look at the bar below. Highlight the progress bar for Hand Dyed Socks. Right click. Click on view selection source. Highlight and right click on the code to copy it. Now you can paste this in your own blog.
Hand Dyed Socks
70%
You can then change the name and put in the name of YOUR project - this is easy to see in the html, and so it's easy to change. Here the name of my project is Hand dyed socks.
You can also see where the percentage is in the html - it's one of the last things before the end. In this example, it's 70%. You can change this to meet your needs.
The place to put the colored graph in is a bit more tricky. In my code, the width of the graph is 180 px. This is indicated toward the end of the code. Farther up in the code is the place to indicate the size of the bar in the graph. Here it's 126px, because I'm 70% done, right? Remember to change this number, too.
Now give it try with my current progress bars in the sidebar. Try copying one. It'll give you an idea of how to look at the source selection from other blogs.
I can't seem to make the sample progress bar fill with color, and still make it usable for you to copy. Trust me, this is the proper html for side bars, just not for use in the blog text portion.
You can do this for however many progress bars you would like. I know you can change the colors and sizes of the bars, but I haven't experimented with them. I'm OK with what I have for now - maybe I'll get snazzier in the future.
Now experiment with those bars/graphs/whatever you want to call them! Hey, send me a link to your blog if you use any of my advice. That'd be so cool!

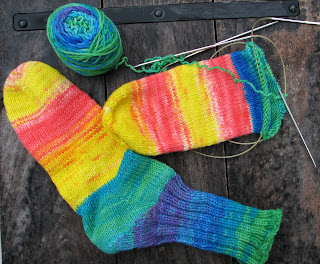
I managed a bit more work on the bright socks for the 11 year old during my lunch break today. Don't 'cha love the comments you get when you knit in public? Today I got the "I couldn't wear wool socks - they're SO itchy" Well, I'm here to tell you, THESE ARE NOT ITCHY!!!!


5 comments:
I used your suggestion regarding the "on the needles" side bars. I had to make them a bit narrower to fit properly in my blog. Great advice, I've been trying to figure out how to make them for the longest time. Thank you!
Love the socks!
Oh my, those instructions scare me a bit but I might break out of my techno-phobia enough to try it.
It gets annoying when people ASSUME that wool is itchy. I LOVE wool!
Thank you so much for this tutorial! I was searching for hours to do a progress bar to chart my weight loss.
I wasn't finding anything until your blog. I was able to customize it and add it as a widget to Blogger. You are awesome!!
Thank you so much for this tutorial! I was searching for hours to do a progress bar
Post a Comment